Now Reading: How to Backup iPhone in 2024: A very useful Step-by-Step Guide
- 01
How to Backup iPhone in 2024: A very useful Step-by-Step Guide
How to Backup iPhone in 2024: A very useful Step-by-Step Guide

Learn how to backup iPhone through this comprehensive guide. This method is so easy even your children can do it. We have covered multiple methods, including iCloud, iTunes, and Finder, which will keep your data safe and secure. Now you don’t need to go to any expert, you can backup your iPhone by following these simple steps at home.
Backing up your iPhone time to time is very important because so much of what we value is stored on our phones. From photos that capture our memories to contacts we interact with daily, messages that keep us connected with our loved once, and applications that simplify our lives—losing all this due to accidental damage, loss, or during an upgrade would be devastating and traumatize.
That’s why creating a proper backup gives you peace of mind, knowing everything can be restored easily if something bad happens. In this article, we have covered the easiest and most effective methods to backup your iPhone using iCloud, iTunes, and Finder. Whether you’re new iPhone user or have been using it for years, this article will make the process simple and easy to follow.
Table of Contents
Why Is It Important to Back Up Your iPhone?
Nowadays, our lives dependent on our phones, as we keep so much of our lives data into it— family photos, important contacts, personal messages, and important documents files. Backing up your phone time to time isn’t just a technical task, it’s an art to protect your important data and save yourself from unnecessary stress.
Let’s break down why backing up your iPhone is so important:
- Data Loss Protection: Imagine if your iPhone gets lost or stolen—all your data could disappear or deleted too. Having a data backup will ensure that no matter what happens, you can easily restore it without any hassle.
- Easy Transfer: Getting a new phone is exciting, but transferring all your data can be a bigger task and headache too. If you have your phone backed up ready, moving everything to a new iPhone becomes easy and effortless.
- Peace of Mind: knowing that your important data is safe, whether it’s family photos or important work files, gives you a sense of relief. You can use your phone without worrying that everything is secure and can be restored easily.
Now, let’s explore the different methods that will help to backup your iPhone and keep your data safe.
How to Backup iPhone with iCloud?
Taking a backup of your iPhone is a very important step, and iCloud makes this process the easiest. Wouldn’t it be great if your phone automatically, without any cables or efforts, keeps all your important data and files safe? That’s exactly what iCloud does—it’s a simple, wireless, and automatic process! Once you set it up, you don’t need to do anything else; it keeps your data safe forever.
What is iCloud?
iCloud is Apple’s own cloud storage service, which comes with both free and paid options, allowing you to store your iPhone’s data either automatically or manually. This means, if your phone ever gets lost or you buy a new one, you can easily recover all your data without any stress.
Steps to Backup iPhone to iCloud:
- Connect to Wi-Fi : First, connect your iPhone to a reliable Wi-Fi network because iCloud backup only starts over Wi-Fi, not cellular data. The reason is speed—although it is possible on cellular, it’s often restricted due to daily internet data limits.
- Open Settings: On your phone’s home screen, tap the “Settings” icon. This is where you start setting everything up.
- Tap on Your Name: In the Settings menu, tap on the banner at the top displaying your name or Apple ID.
- Select iCloud: Once the Apple ID menu opens, tap on the “iCloud” option, which allows you to access your phone’s cloud settings.
- Toggle iCloud Backup: Scroll down a bit until you find the “iCloud Backup” option. Tap on it, and if it’s off, switch it on. Here, you can decide whether your phone will backup automatically or manually.
- Tap on ‘Back Up Now’: If you want to take a backup immediately, tap “Back Up Now.” This will backup all the data on your phone up to that moment.
- Wait for the Process to Complete: During the backup process, make sure your phone stays connected to Wi-Fi and has a full charge or is plugged in to avoid interruptions. It may take some time, especially if you have a lot of data, and it also depends on your internet speed.
Advantages of iCloud Backup:
- Wireless and Automatic: Once it’s set up, you don’t have to do anything—your phone will automatically backup. It’s completely hassle-free!
- Accessible from Anywhere: As long as you have Wi-Fi, you can access your backup data from anywhere, no matter where your phone is.
- No Need for a Computer: There’s no need to deal with cables or a computer; everything happens wirelessly. You just need a high-speed Wi-Fi network.
Disadvantages of iCloud Backup:
- Limited Free Storage: iCloud only offers 5GB of free storage per iPhone, which is quite limited given today’s needs and fills up quickly. If you need more storage, you’ll have to purchase extra space.
- Requires a Stable Wi-Fi Connection: A high-speed and stable Wi-Fi connection is necessary for the backup. If the Wi-Fi is weak or unstable, the backup process can pause or remain incomplete.
- Backup Everything: In automatic mode, iCloud may backup unnecessary data as well, causing your free storage to fill up faster.
iCloud backup is a simple, easy, and reliable option, but it comes with some limitations like free space and Wi-Fi connectivity. If you want to keep your data secure without much effort, iCloud is a good option.
How to Backup iPhone Using iTunes (Windows)
If you don’t want to use iCloud because of privacy concerns, or if you have limited iCloud storage and don’t want to pay for more, you can back up your iPhone using iTunes on your Windows PC. This method is a perfect option for people who don’t want to depend on the internet or cloud storage and want full control over their data. Many people choose this method for security reasons as well.
Steps of How to Backup iPhone Using iTunes:
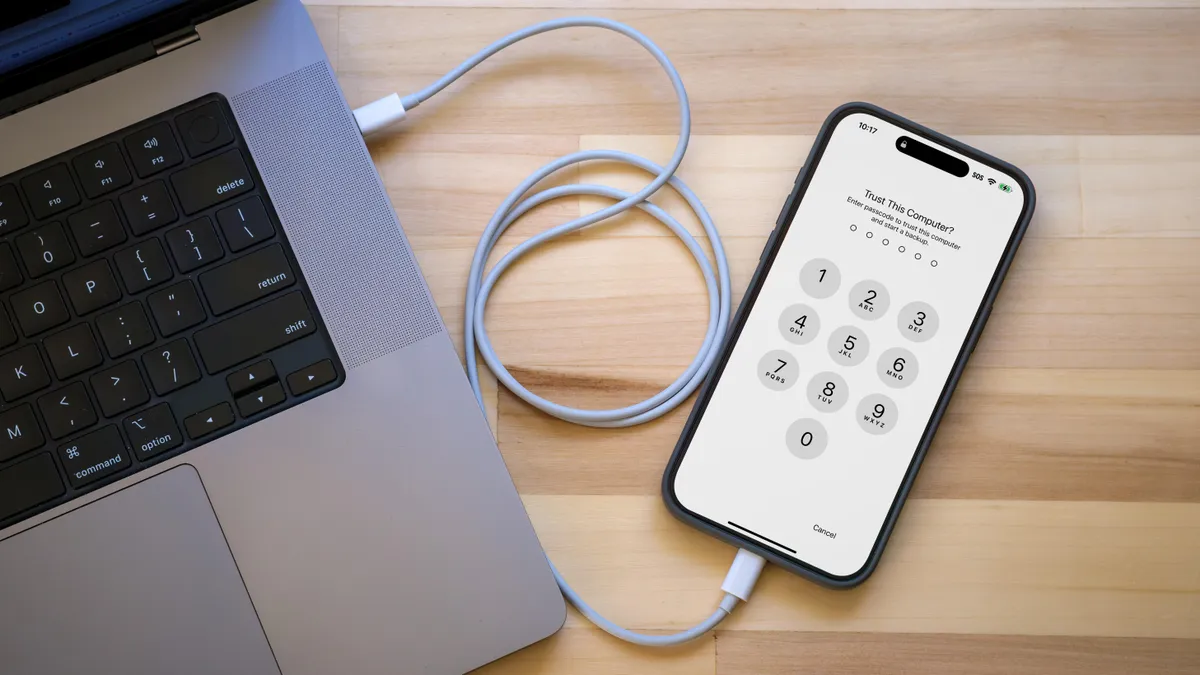
- Connect Your iPhone to PC: First, connect your iPhone to your Windows computer using a Lightning cable. This ensures that your device is properly recognized by the computer.
- Open iTunes: Open the official iTunes application on your computer. Make sure you’re using the latest version to avoid any compatibility issues during the process.
- Select Your iPhone: Once iTunes is open, you’ll see a small iPhone icon in the upper-left corner. Click on this icon to access your phone’s settings.
- Select ‘This Computer’: In the Backups section, select This Computer so that your backup is stored on your PC and not on iCloud.
- Encrypt Your Backup (Optional): If you want to back up sensitive information like passwords, health data, or HomeKit settings, select the Encrypt iPhone Backup option. You will need to set a password, which you should remember, as this adds extra security to your backup.
- Click on ‘Back Up Now’: After everything is set, click Back Up Now to start the backup process. Your current data will be backed up and saved to your computer.
- Wait for the Process to Complete: Keep your iPhone connected to the PC until the backup process is complete. If you have a lot of data, it may take some time, so be patient. Once the backup is done, your data will be safely stored on your PC, and you can encrypt it with a password for extra security.
Advantages of iTunes Backup:
- No Need for Internet or iCloud Storage: Everything is saved on your personal computer, so there’s no need to worry about using up iCloud space or paying for extra storage.
- Full Control Over Local Backup: You have complete control over when, where, and how to store your backup.
- Extra Security with Encryption: Encrypting your backup gives your sensitive data extra protection, which is a great option if security is important to you.
Disadvantages of iTunes Backup:
- Requires a Computer: Unlike iCloud, this process requires a computer, which can be inconvenient since you can’t always carry your PC everywhere. At such times, you won’t be able to access your backup data.
- No Automatic Backups: Unlike iCloud, iTunes doesn’t back up your data automatically. You have to manually initiate the backup, and you need a PC to do it.
If you want full control over your data or don’t want to use iCloud, iTunes can be a reliable and safe option. It allows you to keep your backup secure without relying on external cloud storage!
How to Backup iPhone Using Finder (macOS)
Starting with macOS Catalina (10.15), Apple replaced iTunes with Finder for managing iPhone backups. If you’re a Mac user, this is an easy and reliable method for backing up your iPhone. Let’s see how you can easily back up your iPhone using Finder:
Steps How to Backup iPhone Using Finder:
- Connect Your iPhone to Mac: To start the process, first use a Lightning-to-USB cable to connect your iPhone to your Mac. Make sure the cable is properly connected so that there is no interruption in the backup process.
- Open Finder: On your Mac’s dock, find and click on the Finder icon. Once Finder opens, you will see your iPhone listed under Locations in the sidebar, which will help you begin the backup process.
- Select Your iPhone: Click on your iPhone’s name to access its settings. Here, you will see device management options, where you’ll find the backup section.
- Select ‘Back up all of the data on your iPhone to this Mac’: In the Backups section, select the option “Back up all of the data on your iPhone to this Mac” to ensure all your data is saved on your Mac.
- Encrypt Backup (Optional): If you want to back up your passwords, health data, or other sensitive information, check the Encrypt local backup option and set a secret password. This will secure your backup, ensuring that no one else can access it.
- Click on ‘Back Up Now’: After setting everything up, click the Back Up Now button to start the backup process. This will immediately save your current data onto your Mac.
- Wait for the Process to Complete: Keep your iPhone connected to the Mac until the backup process is complete. If you have a large amount of data, it may take some time. Once the backup is finished, your data will be safely saved on your Mac.
Advantages of Finder Backup:
- Control Over Local Backup: If you store your backup data on your Mac, you have full control over it and can restore or access your data whenever you want.
- No Need for Cloud Storage: This method eliminates the need for iCloud or any other online storage, saving you both money and ensuring better security.
- Extra Security with Encryption Option: By using the encryption option, your sensitive data becomes even more secure, and only you will be able to access it.
Disadvantages of Finder Backup:
- Requires a Mac: This method only works for people who have a Mac. Windows users do not have this option.
- No Automatic Backups: Unlike iCloud, Finder requires you to manually initiate backups, which can sometimes be inconvenient.
Backing up your iPhone with Finder is a simple and secure option, especially if you prefer saving your data locally. This method is ideal for those who do not want to store their data in the cloud and prefer managing their backups manually.
FAQs About How to Backup iPhone
- Q: How often should I back up my iPhone?
A: You should regularly back up your iPhone, at least once a week. If you have iCloud storage available, iCloud can automatically back up your phone daily, as long as it’s connected to Wi-Fi and charging. If you’re using iTunes or Finder, you’ll need to remember to take manual backups or set reminders on your phone to ensure regular backups. - Q: What happens if I don’t back up my iPhone?
A: If you don’t back up your iPhone, you risk permanently losing important data in case your phone gets damaged, lost, or accidentally reset. This can result in the loss of photos, contacts, messages, and app data that cannot be recovered, leading to unnecessary stress. - Q: Can I back up my iPhone without Wi-Fi?
A: If you are using iCloud for backups, then Wi-Fi is required. However, if you’re using iTunes or Finder, you can back up your iPhone by connecting it to your Mac or Windows computer via a cable without needing an internet connection. This method is especially helpful when you don’t have a stable Wi-Fi connection, which is necessary for uninterrupted data transfer. - Q: How can I check if my iPhone backup was successful?
A: If you’re using iCloud, go to Settings > [Your Name] > iCloud > iCloud Backup to check the last successful backup time. For iTunes or Finder, connect your iPhone to the computer and check the “Summary” page to view the details of your last successful backup. - Q: Should I encrypt my iPhone backup?
A: Yes, encrypting your backup is highly recommended, especially if you want to include sensitive information like passwords, health data, and other personal data. An encrypted backup provides extra security, and no one can access the data without the password, ensuring your information remains private. - Q: Should I back up to iCloud or locally?
A: It depends on your preference. If you want a hassle-free, automatic solution, iCloud is the best option because it works wirelessly and allows you to access your data from anywhere. However, if you want complete control over your data and don’t want to rely on an external server, a local backup via iTunes or Finder is a better option. - Q: How can I transfer my old data when I get a new iPhone?
A: When you purchase a new iPhone, you’ll be given the option to restore your backup during the setup process. If your backup is in iCloud, simply log in with your Apple ID to restore your data easily to the new device. If you’ve taken a local backup, you can restore your data via iTunes or Finder just as easily.
Conclusion
Backing up your iPhone is essential to ensure your data remains safe in unexpected situations, such as your phone being lost, stolen, damaged, or affected by software glitches. It’s a good habit to back up your data regularly, whether you prefer using iCloud or local backups through iTunes/Finder.
iCloud offers convenient wireless and automatic backups, while iTunes and Finder give you full control and the option to encrypt your data locally. Regular backups save you from the stress of data loss, ensuring that your important files, contacts, and apps stay secure no matter where you are or what happens.
Tips for a Successful Backup:
- Always make sure you’re using the latest iOS version and software for added security.
- If you’re taking a local backup, enable the encryption option to add an extra layer of protection to your sensitive data, ensuring that only you can access it.
- If your iCloud space is limited (you get 5GB for free), delete unnecessary data or consider purchasing extra storage to keep your important data safe.
The backup process is simple, but its impact is significant—backing up regularly ensures you never have to deal with the stress of losing your data.


zoritoler imol
Youre so cool! I dont suppose Ive learn anything like this before. So good to search out any person with some original thoughts on this subject. realy thanks for beginning this up. this website is something that is wanted on the internet, someone with somewhat originality. useful job for bringing one thing new to the internet!
digital banking
Link exchange is nothing else but it is only placing the other person’s blog link on your page
at proper place and other person will also do same for you.
vorbelutrioperbir
Sweet internet site, super design and style, really clean and use pleasant.